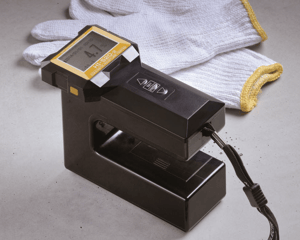
 Accurate measurement of a product’s moisture content is critical in most manufacturing settings because of its role in the consistency of a product; moisture can also affect shipping costs, performance, taste, durability and a number of other factors.
You may think that investing in sophisticated measurement instrumentation ensures the accuracy you need to optimize the quality of your product but, in fact, every method of testing can be affected by unique challenges. No matter the industry, there are five commonly identified challenges to primary and secondary testing methods that may erode the accuracy of the equipment’s readings if not addressed.
Misreading true moisture
Primary methods of measuring moisture like Karl Fischer (KF) or Loss on Drying (LOD) can be measuring more than just water; your KF readings can also include the hydrated OH molecules. Similarly, LOD primary testing will read the weight loss after drying as that of water, failing to account for the simultaneous evaporation of other volatiles present in the product. In misreading these components as water, measurement instruments will deliver inaccurate results.
This concern isn’t unique to primary methods. Nuclear moisture meters can also return faulty results if the initial calibration is impacted by the presence of hydrogen outside of the water molecule.
For KF tests, you need to confirm that hydrated molecules are not present or adjust final results for the hydrates. Simultaneously, the LOD test protocol should be examined. Try running split samples with lower temperatures for longer periods and see if the moisture contents agree. If not, the protocol needs to be altered or an adjustment factor entered to correct to “true” moisture.
Sample density variances and surface measures
Electrical, microwave and near infrared (NIR) secondary methods of measurement, while faster, easier, safer and requiring less operator experience, have their own set of limitations.
By their nature, electrical and microwave test methods are not elaborate tests accounting for complex sample structures. The moisture readings of dense samples can be quite different from those that are less dense, even if the moisture content of the two is identical. Another example of density’s impact is shown when testing samples consisting of multiple layers (think plywood); these meters don’t have the ability to read the layers independently so the reading may only reflect superficial results. In these cases, primary methods are likely the best alternative.
In the same way, NIR meters apply single stratum measurement and wouldn’t likely be the choice for coated or highly variable core vs. surface samples like coated candy. If a sample has developed a crust or if the product is composed of layers (like a coated candy), only the surface value is returned. It’s simple enough to eliminate the chance that your product develops a crust, but if your product is multilayered, sample preparation or another method of moisture measurement is recommended.
Environmental factors (air purity, humidity, structural interference)
The environment can significantly affect all primary testing methods. Because of their sensitivity to air particulates, and humidity. primary measurement is usually relied upon only in a lab setting where ambient factors can be stringently controlled.
Unlike other secondary methods that offer the flexibility to be used nearly anywhere, microwave testing equipment needs to be recalibrated any time the product being tested is moved due to potential interference on the microwave signals caused by a surrounding mass.
At line measurement is typically best handled by NIR equipment because of its relative insensitivity to environmental factors.
Calibration accuracy
By definition, primary methods of moisture measurement don’t require calibration. In fact, they’re the yardstick by which secondary measurement accuracy is determined.
NIR meters are initially calibrated against a primary method. While that can be a bit of a process, it ensures the most reliable measurement from the start. Without this initial calibration, readings will not provide the product-specific analysis necessary.
Similarly, microwave, nuclear and electrical methods require comparison to a referee method whether primary or reliably calibrated secondary method. By comparing the two sets of values and doing a regression or multiple linear regression analysis to determine the relationship between the two, a calibration coefficient will be identified that is then entered into the new analyzer. In these cases, making sure your comparison method is accurate is critical to the accuracy of your new equipment.
Operator error
Unfortunately, operator error is inevitable but there are steps to mitigate the risk.
For primary methods, training is critical. Just like a mechanic knows how to change a car’s oil but certified manufacturer technicians receive additional training specific to the make/model, lab techs should not only be trained on the process but the nuances of the instrumentation itself.
For secondary methods, nearly anybody in the plant can conduct the tests with the exception of nuclear testing. As long as protocols are clearly defined, no special training will be required, thus reducing potential errors.
No instrument is without its challenges but all are avoidable by taking the right steps. Most important to accurate measurement is that (1) you’re using the method best suited for your needs, and (2) that you invest in the right instrument(s) to conduct that testing. To learn more about the different methods of moisture measurement, download our “6 Methods for Determining Moisture”; if you’d like some practical guidance for choosing the right equipment and vendor, take a look at our “Guide to Finding an Accurate & Reliable Moisture Meter” download. To get your free copy, click the link below!


